
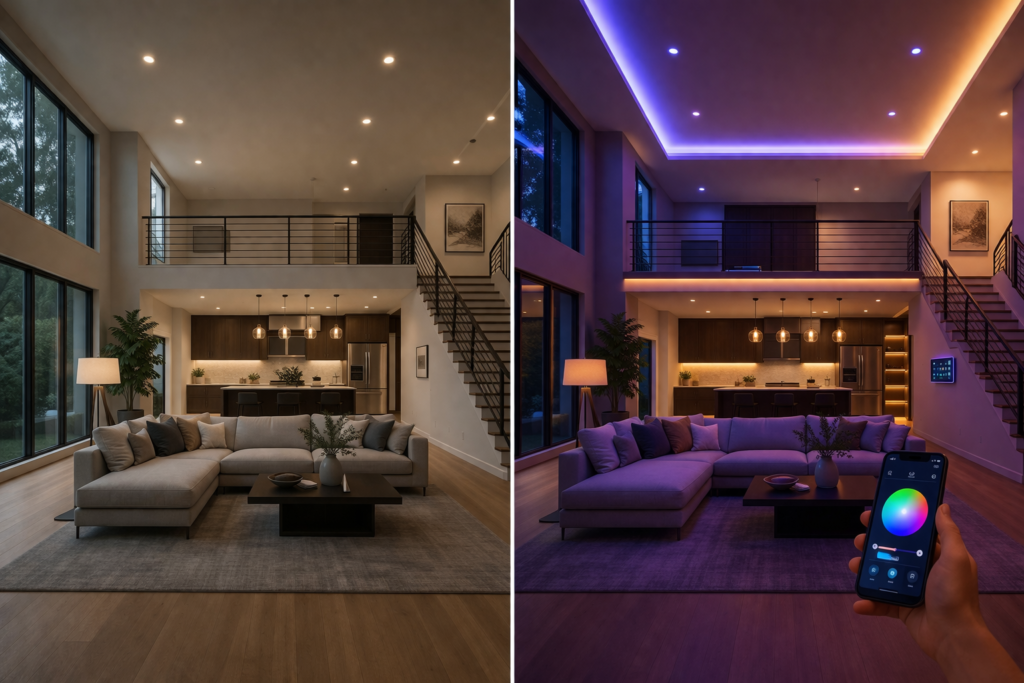
Manage your lights with your phone in mere minutes once you figure out how to put in smart lights. This convenient improvement is quick and easy once you understand how to integrate them into your home setup, allowing you to do everything from switching off lights you’ve forgotten about while in bed to preparing for a night at the movies.
By 2026, smart lights have gone from a niche smart home component to a standard one in many houses.
If you’re new to smart homes, check our complete guide on smart lighting systems to understand how everything works.
However, it doesn’t stop there. Smart lights have been shown to cut your electricity bills down by as much as 60%, thanks to scheduled operation and the efficiency of LED bulbs. Additionally, they increase your security while you are on vacation by mimicking presence and offering remote access.
We’ve created this ultimate guide specifically for beginners and homeowners looking to upgrade their lighting systems without having to resort to expensive electricians. Technical skills are not a necessity – all you need are simple instructions on how to do it yourself.
Table of Contents
What You Need Before Setting Up Smart Lighting
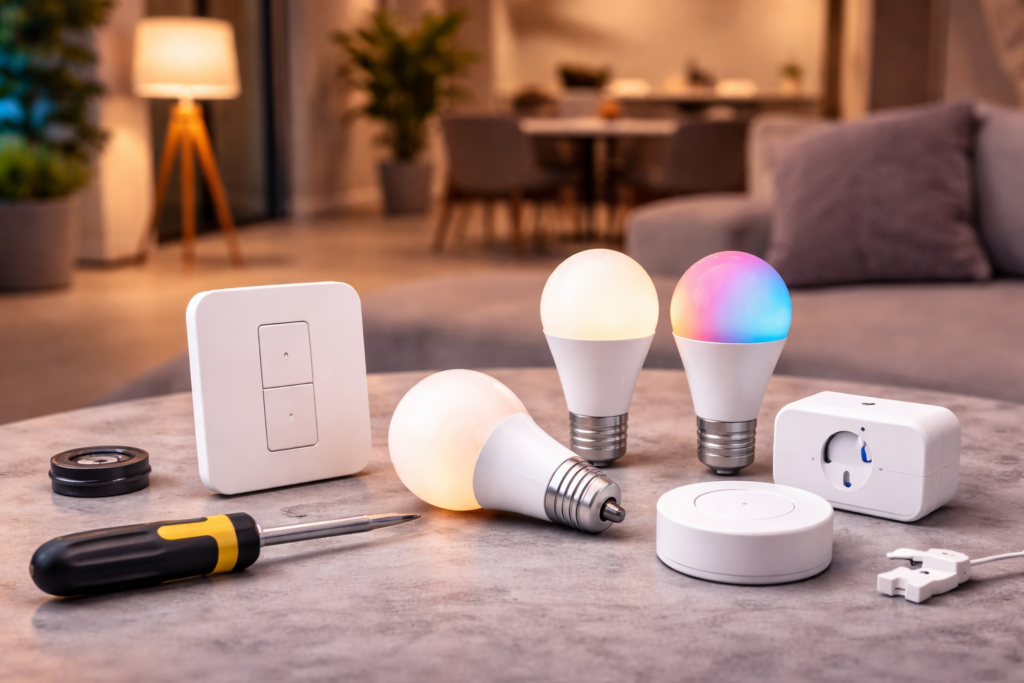
Essential Requirements
Reliable Wi-Fi Network
It has been stated previously that having an efficient Wi-Fi connection is absolutely important while dealing with smart bulbs. See to it that your Wi-Fi coverage includes all those areas where you want to install your bulbs. If there is poor signal strength in some particular rooms, then you may go for a Wi-Fi extender.
Smartphone or Tablet
In order to operate your smart lighting system effectively, you need a mobile device where you can install and run a smart lighting application. All leading brands of smart lighting have an app available for Android and iOS. You do not need to have fast internet, but you definitely need the latest operating system update.
Compatible Smart Lights
In order to get your first smart lighting kit, buy a smart light which could be either a light bulb or a light strip, depending on your preference. You can control all these devices separately using their applications for mobile phones. You can even add more lights to your collection.
Types of Smart Lighting Devices
Different smart lighting devices exist, which cater to varied purposes, costs, and installation processes.
💡 Smart Bulbs
These are one of the most convenient smart lighting products that you can easily use for building a smart lighting system. Smart bulbs just screw on to your light fixtures and thus allow you to link them to your home Wi-Fi network or smart home system. They have features such as remote operation, dimming, scheduling, and color changes.
Best for: Renters, beginners, and quick DIY setups.
🎛️ Smart Switches
Such intelligent lighting devices help control the available lights in the house by switching them on/off through the normal switch. Such an intelligent lighting device is easier to operate in case of chandeliers and ceiling lights.
Best for: Homeowners who want a permanent and professional-looking installation.
🔌 Smart Plugs
The smart plug may also be considered when making your existing lamps or table lamps smart. This will be quite an easy task, as you just need to connect the gadget to your electrical outlet and connect your light fixture to it. It is very easy to automate all of your lights.
Best for: Table lamps, floor lamps, string lights, and budget-friendly automation.
🏠 Smart Hubs
A smart hub may also be regarded as the central intelligence unit that controls other devices around the house. While modern smart lights and smart switches allow for WiFi connections, you may gain much more by using a smart hub.
Best for: Larger smart home setups and users who want advanced automation features.
Quick Comparison
| Device Type | Installation Difficulty | Best Use Case |
|---|---|---|
| Smart Bulbs | Easy | Individual rooms and renters |
| Smart Switches | Moderate | Whole-room lighting control |
| Smart Plugs | Very Easy | Lamps and decorative lighting |
| Smart Hubs | Easy | Advanced automation and device management |
Choosing the right combination of these devices depends on your home’s layout, budget, and the level of automation you want to achieve.
Check out our complete guide to smart home devices for more information on building an integrated system.
Choosing the Right Smart Lighting System
Based on Your Home Type
The best smart lighting setup often depends on whether you rent or own your home.
🏢 For Renters
Smart bulbs can be seen as the ideal choice for tenants since there is no need for any electrical installation. This is achieved by just replacing the existing light bulbs in your home and connecting them to the application.
Smart plugs can also be used by tenants as a means of automating their decorative lighting without having to replace any of the light bulbs or even flipping the wall switches.
🏠 For Homeowners
Homeowners get to exercise the most discretion when choosing smart lighting solutions. The best solution is using the smart switch since it allows for control of the entire room’s lighting without tampering with the existing design.
The smart switches are more effective compared to smart bulbs since their functionality is not affected by who turns the lights on. The solution thus becomes more efficient in situations with multiple people around.
⭐ Best Approach: A Combination Setup
For many homes, this flexibility can be attained through the use of smart switches along with smart bulbs.
A popular strategy is to:
- The installation of smart switches within high traffic zones like living rooms, kitchens, hallways, and entrance ways.
- Smart bulbs installed in rooms like bedrooms, work spaces, leisure rooms, and anywhere else their capability of being dimmed or changed in color might come in handy.
- Smart plugs used for lamps, accents, and festive lighting.
This configuration should provide homeowners with both practical access and some advanced capabilities as well.
Smart Lighting Budget Guide
The cost of a smart lighting system can vary significantly depending on the number of devices, features, and level of automation you want. The good news is that you can start small and expand your setup over time.
💰 Basic Setup ($20–$50)
Simple budget is best for newbies trying to experiment with smart lights without spending too much money.
Typical setup:
- 1-2 smart light bulbs or plugs
- Basic smartphone app
- Scheduled on-off timers
- Dimmer functions
- Smart assistant integration
Usually, basic devices do not require extra hubs but only have Wi-Fi connectivity, thus allowing them to be used even in apartments.
💡 Intermediate Setup ($50–$150)
Within this budget range, you can set up automated controls for your whole room with advanced features included.
Typical setup:
- Use of several smart bulbs or switches
- Automation of the room lights
- Changeable colors of the bulbs that can be used to set moods
- Customizable programs for the light settings
- Voice and application controls
This is best suited for living rooms and entertainment rooms.
🏠 Premium Setup ($150+)
The premium smart lighting solution provides an excellent automation system that is reliable and easily integrated into the broader smart home system.
Typical features include:
- Smart dimmers
- High-quality smart lighting
- Smart outdoor lighting
- Motion sensor-based automation
- Integration into the smart home hub
- Routines and scenes
For those who desire professional-level lighting within their smart homes, this product is perfect for you.
Budget Comparison
| Budget Range | Best For | Key Features |
|---|---|---|
| $20–$50 | Beginners | Basic smart control, scheduling, dimming |
| $50–$150 | Room Automation | Multiple devices, color lighting, scenes |
| $150+ | Advanced Smart Homes | Full automation, outdoor lighting, smart home integration |
Pro Tip
Begin with a couple of devices that you really need and grow from there. This will help you figure out what you need the most while slowly spreading out costs. Most people tend to start with either smart lights or plugs and then move on to things like switches and hubs.
Voice Assistant Compatibility
One of the greatest strengths of any smart lighting system is its compatibility with voice assistants.
🗣️ Amazon Alexa
Amazon Alexa is currently the most compatible voice-controlled assistant for smart lighting. Almost all leading smart lighting companies support Alexa integration, making it simple to control your lights using voice commands.
Examples include:
- “Alexa, turn on the lights in the kitchen.”
- “Alexa, reduce the brightness of the living room lights to 30%.”
- “Alexa, change bedroom lights to warm white.”
Alexa can be used to automate your smart home, coordinating different devices using a single voice command.
🤖 Google Assistant
Google Assistant provides similar lighting controls but works seamlessly within Android smartphones and Google Home devices.
Key benefits include:
- Voice-controlled lighting and scenes
- Automated smart home capabilities
- Compatibility with Google Home devices
- Natural language processing
Examples of commands users can give include:
- “Hey Google, make the lights brighter.”
- “Hey Google, turn off all the downstairs lights.”
🍎 Apple HomeKit
The Apple HomeKit prioritizes privacy, security, and dependability. HomeKit enabled devices are required to pass certain certification criteria to maintain uniformity in user experience.
Key features include:
- Voice Control using Siri
- End to End encryption of Smart Home information
- Automation using the Apple Home app
- Compliance with iPhone, iPad, Apple Watch and HomePod
Even though HomeKit works with a lesser number of devices compared to Alexa and Google Assistant, it is still a preferred choice for people in the Apple ecosystem.
Quick Comparison
| Platform | Best For | Key Advantage |
|---|---|---|
| Amazon Alexa | Most users | Broadest device compatibility |
| Google Assistant | Android users | Strong natural language processing |
| Apple HomeKit | Apple users | Enhanced privacy and security |
Which Voice Assistant Should You Choose?
Alexa supports more smart lighting systems than any other voice assistant. Android users might find Google Assistant to be a better choice due to seamless connectivity to all Google-related apps. HomeKit is the right choice for Apple device owners, as it prioritizes security and privacy.
It is best to choose a voice assistant according to the hardware you already have.
If you’re building your first smart lighting setup, this guide covers the most important devices you need. –Best Smart Plugs of 2026
Types of Smart Lighting Connections Explained
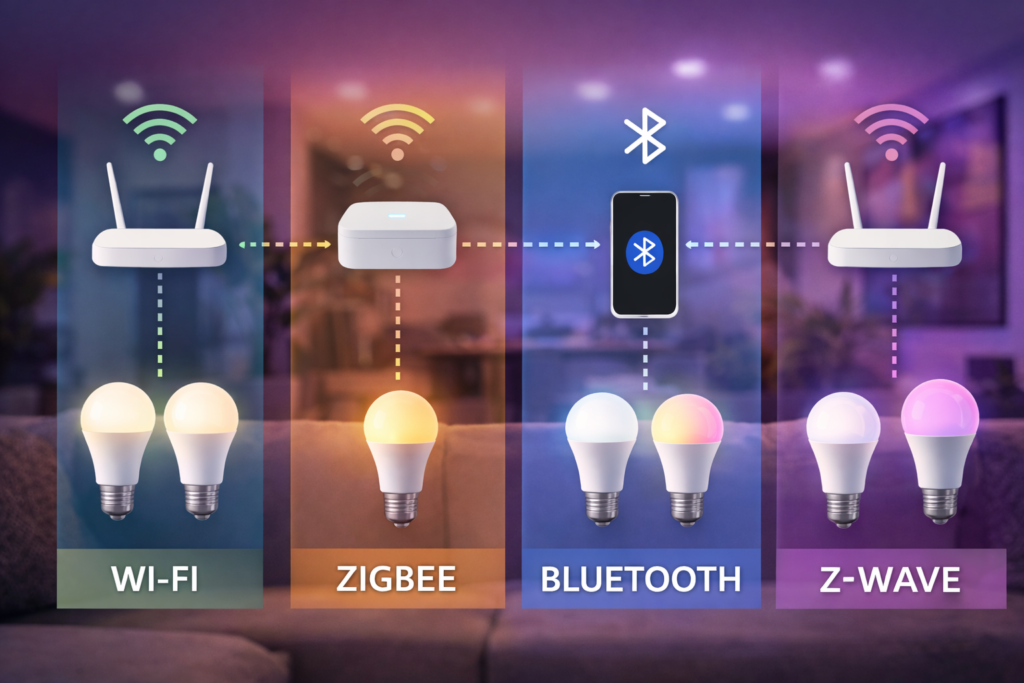
Smart Lighting Connectivity Options
The choice of the proper connectivity technology is one of the key aspects of designing a smart lighting system that would be dependable. Each type brings its own benefits to design and performance.
📶 Wi-Fi
Wi-Fi remains the top choice when it comes to connecting smart lighting fixtures, and it is great for people who are new to smart technology. Wi-Fi smart lighting fixtures like lights, switches, and plugs can be connected to your home network without adding extra hardware to your system.
Pros:
- Quick and easy installation
- No need for an extra hub
- Remote accessibility from anywhere
- Wide compatibility with smart home ecosystems
Cons:
- May overload your network due to multiple device connections
- Consumes more energy compared to other types of wireless technology
- Limited functionality during internet outages
Best for:People seeking a convenient and budget-friendly solution to their smart lighting needs.
📱 Bluetooth
Smart LED lights that have Bluetooth connectivity can be directly connected to your smartphone or tablet, without the need for Wi-Fi.
Pros:
- Quick and easy setup
- Wi-Fi not needed
- Effective when controlled near the lamp
- Uses less energy
Cons:
- Short-range control
- Remote operation not possible
- Lacks automation features
Best for: Ideal for small flats, bedrooms, bedside lamps, and people requiring only local control.
🔗 Zigbee
Zigbee represents a type of low-energy wireless technology which is used mostly in intelligent smart home networks. This protocol establishes a mesh network that allows devices to exchange information and expand coverage in the entire house.
Pros:
- High reliability
- Minimal energy usage
- Good performance in big houses
- Facilitates large automation tasks
Cons:
- Needs a hub
- A bit harder to set up
- Costlier
Best for: Large houses and people who want to establish an entire smart home system.
🏠 Z-Wave
Z-Wave is one more network technology that operates based on a mesh network topology but has been created specifically for use with smart homes’ equipment.
Pros:
- Stable device communication
- Effective automation support
- High scalability potential
- Minimal disruption to Wi-Fi signals
Cons:
- Needs a separate central hub
- Higher prices of the devices
- More complicated installation procedure
Best for: Smart home enthusiasts and owners who want professional-quality performance from their smart home system.
Quick Comparison
| Technology | Hub Required | Remote Control | Best For |
|---|---|---|---|
| Wi-Fi | No | Yes | Beginners and most households |
| Bluetooth | No | No | Small spaces and local control |
| Zigbee | Yes | Yes | Larger homes and advanced automation |
| Z-Wave | Yes | Yes | Professional-level smart home systems |
Which Connectivity Option Should You Choose?
Wi-Fi smart lighting presents the most effortless installation process with the ideal blend of convenience, cost-effectiveness, and flexibility for home users. For individuals wishing to incorporate smart homes featuring numerous interconnected devices, Zigbee/Z-Wave is a good choice, while Bluetooth would be suitable for individual room smart lighting installations without the need for remote control.
Step-by-Step Guide to Set Up Smart Lighting
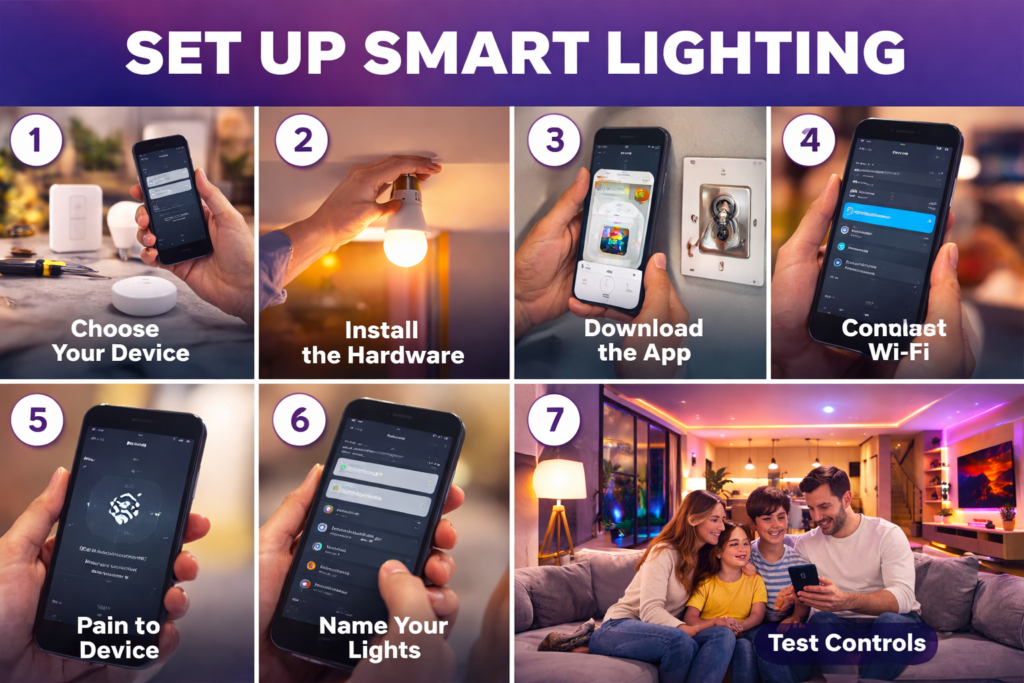
Step 1: Choose Your Device
Smart bulb or smart switch selection depends on individual preference and requirements. Smart bulbs are recommended for renters, decorative lamps, and colored lights while smart switches will suit homeowners, multi-bulbs fixtures, and traditional wall switches better.
Compatibility is an important factor before the purchase of any product. For instance, A19 bulbs can be used with most lamps and ceiling fixtures while BR30 bulbs can only be used for recessed lighting. The typical energy consumption of smart LED light bulbs is around 8-12 watts, providing an equivalent brightness of 60-100 watts incandescent bulbs.
When choosing a smart switch, ensure that the electrical box contains a neutral wire, which is a bunch of white wires. Some switches can operate without a neutral wire but are pricier and have limited functionality.
Step 2: Install the Hardware
Putting up a smart bulb is easy because all you have to do is put in your old bulb and switch on the light again. It’s best to confirm compatibility with an enclosed fixture or shade before installing the smart bulb.
The installation process of smart switches can be slightly complex since it involves dealing with wires. The first step in installing a smart switch is to make sure that the power to the switch is switched off at the circuit breaker and confirmed to be switched off using a voltage tester.
Always seek professional help if you are uncomfortable with electrical installations or if the wiring is strange.
Step 3: Download the App
DDownload the app of your chosen smart lighting manufacturer from either the App Store or Google Play Store. Most reputable manufacturers offer their own apps, where you can control and manage your lighting.
Sign up on the application by using a working email ID in order to avail of any firmware updates and other useful support services. In case requested by the app, activate location services for location-based features.
While setting up the app, make sure to give necessary permissions for Wi-Fi connectivity, camera (for scanning the QR codes) and notifications.
Step 4: Connect to Wi-Fi
The majority of smart lights use 2.4 GHz Wi-Fi, thus, make sure that your router supports such frequency. Note that some smart devices might experience troubles when establishing a connection with 5 GHz networks at the moment of installation.
If you use different SSIDs for your 2.4 GHz and 5 GHz Wi-Fi network, you need to connect your phone to the 2.4 GHz one prior to setting up the device. This step is important because many problems arise due to wrong connection.
One of the key factors causing trouble during the installation is an incorrect Wi-Fi password. It is necessary to input it accurately when asked to do so.
Step 5: Pair the Device
There are multiple methods for connecting new devices via most smart lighting applications. The simplest method among these options is automatic detection. This involves detecting any powered-on devices near your device that are in pairing mode. The signal for this would be a blinking light.
QR Code Pairing may be used as an alternative when the above process fails. In QR code pairing, the QR code attached to the product would simply have to be scanned using the scanner provided in the application.
The final and more manual method is through Serial or MAC Address pairing. Though manual, this process allows you to pair devices which are not automatically detected.
Step 6: Name Your Lights
Label your smart bulbs with descriptive names to facilitate easier access via the app interface and voice commands. Name them according to the rooms they’re installed in, like “Living Room Ceiling Light,” “Kitchen Pendant,” or “Bedroom Table Lamp.”
Be careful not to give confusingly similar names when setting up a voice-enabled smart home since you might accidentally trigger the wrong device while making voice commands. Instead, assign descriptive and easily distinguishable names to all smart bulbs.
Also, consider grouping smart bulbs into categories to simplify their management and automation. Some useful groups include “Downstairs Bulbs,” “Bedrooms,” or “Outdoor Lighting.”
Step 7: Test Control
After the installation process is done, try out your smart lights using the app. Make sure the lights switch on and off accordingly and that brightness can be adjusted as well.
Be mindful of the response time since most smart lights take just a few seconds to respond. Longer reaction times might signal potential problems with the network connection or other similar issues.
Lastly, try some basic settings for the automated features that your smart lights offer. Create a simple routine and test it for a few days before moving on to the more complex automations.
How to Connect Smart Lights to Voice Assistants
Alexa Setup
From the Alexa app, navigate to Skills & Games. Look up your brand of smart lights and activate its skill on Alexa. The skill will give Alexa the ability to communicate with your lights.
Log into your smart light account using the Alexa app and connect your devices. When you’ve done that, either use the Discovery Devices option or say “Alexa, discover devices.”
Now that your lights have been discovered by Alexa, try issuing a command such as “Alexa, turn on the living room light.”
Google Assistant Setup
To get your smart lighting system connected to Google Assistant, you need to open the Google Home app, press the “+” button, and then click on the option for setting up a device. From there, select “Works with Google” and look for your smart lighting manufacturer within the list of available services.
To establish a connection between your lighting service and Google Home, log into your account for the former. Following that, your lights will be found and added by Google.
Some examples of commands to use when controlling your smart lights with Google Assistant include, “Hey Google, turn on the living room lights,” and “Hey Google, turn down bedroom lights to 50 percent.”
Apple HomeKit
Connecting your smart bulbs to the Apple HomeKit is easy; you just need to use your iPhone or iPad, go to the Home App, and click on Add Accessory. From there, scan the HomeKit pairing code available either on the bulb itself or on its box using your phone’s camera.
After pairing with the HomeKit, your bulb will be automatically added to your smart home ecosystem and will allow you to control it using both the Home app and Siri commands.
As for managing and organizing your bulbs, you should group your lights according to rooms and zones in the Home App.
👉You can check official compatibility and setup instructions on Amazon and Google smart home pages.
Creating Smart Lighting Automation
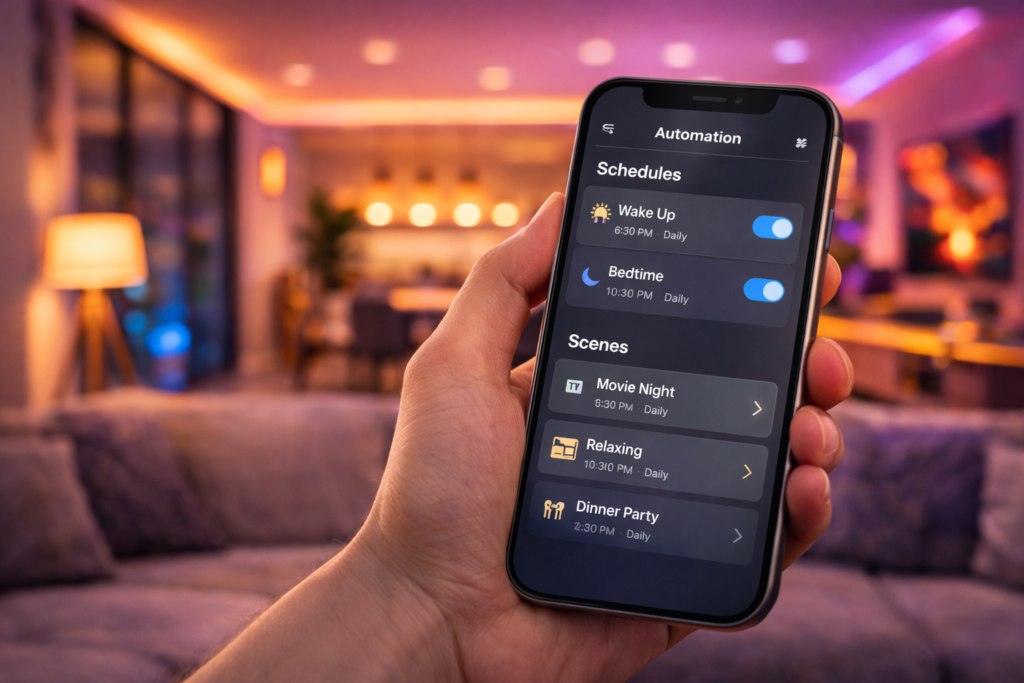
Automation is the magic that makes your smart lights work as an intelligent system rather than simply being remote-controlled lights.
Utilize schedules to switch on/off, brighten/dim lights according to your schedule. Most applications also offer sunrise/sunset automation to ensure your lights automatically adapt themselves throughout the year.
Install motion sensors in areas such as hallways, bathrooms, and closets for hands-free operation of the lights. Moreover, you can also choose different brightness levels for daylight and night-time.
Create lighting scenes for specific activities, such as:
- Movie Night: Dimmed lights with reduced glare.
- Dinner Party: Warm, inviting lighting.
- Focus Mode: Bright, neutral lighting for work or study.
As a further feature to make your life easier, allow geofencing that can automatically turn on your lights when you reach home and turn them off when everyone leaves the house.
Room-by-Room Setup Ideas
📺Living Room
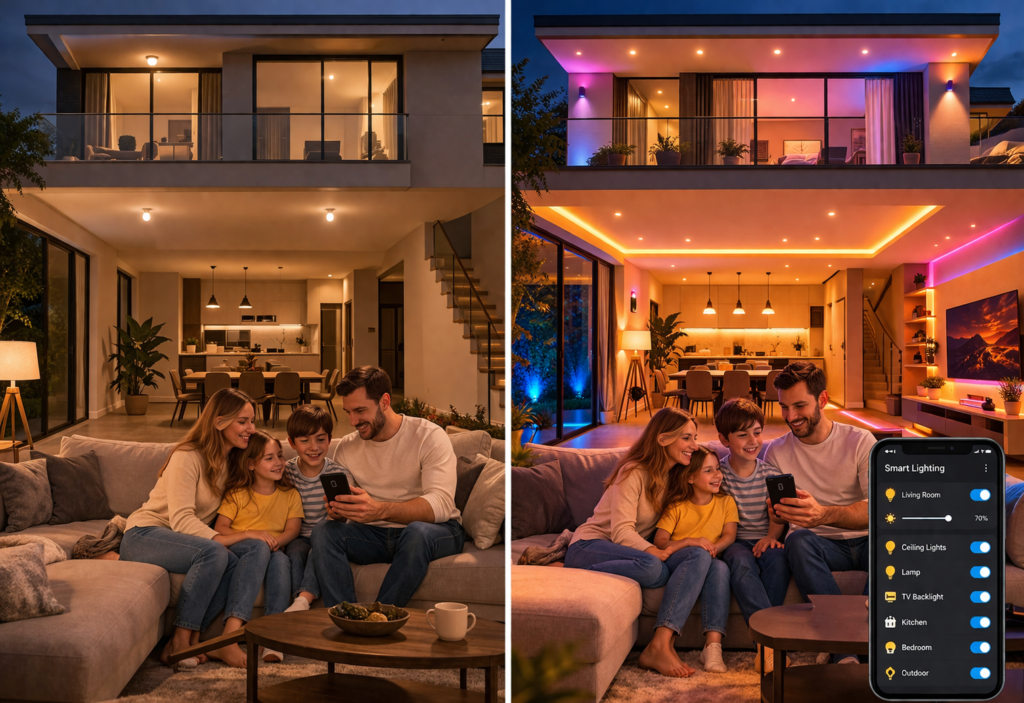
The living room has many uses, so it needs versatile lighting. Consider investing in smart bulbs or switches with color temperature adjustment capabilities, such that you can have warm lighting for the nights and bright lighting during the day.
Have a layered lighting plan where you use overhead lights, floor lamps, table lamps, and accent lighting.
Create custom scenes such as:
- Movie Night: Dark overhead lighting combined with gentle accent lighting to avoid reflections on the screen
- Reading Mode: Intense focus lighting for book reading and magazine reading.
- Entertaining: Gentle, warm lighting that invites guests.
- Relax Mode: Soft lighting.
Alternatively, smart plugs can be used to convert normal lighting into smart lighting, which is both inexpensive and effective.
🛏️Bedroom
Bedroom lights need to create an atmosphere that is conducive not only to restful sleep but also healthy sleep patterns. The use of smart lights with low color temperatures and dimming abilities will help prevent eye strain.
A great choice of smart bedroom light will be smart bedside lamps or smart lights where everyone can set their preferred level of lighting individually.
Useful bedroom automations include:
- Sunrise Wake-Up: Slowly increase the brightness level in the morning to simulate an easier way of waking up.
- Bedtime Routine: Automatically reduce the light levels at night to indicate sleeping time.
- Night Light Mode: Employ minimal levels of brightness during night-time for visibility.
Motion sensors can also prove helpful in the closet area and the adjacent bathroom.
🍽️Kitchen
Lighting needs to be bright and flexible enough to facilitate cooking, dining, and socializing. Install intelligent light switches for main light fittings as well as under-cabinet lights so that all areas in the kitchen can be seen clearly and easily during daily activities.
It is important to install light bulbs with a Color Rendering Index (CRI) value of 90 or more.
Create lighting scenes such as:
- Cooking Mode: Intense Lighting for Preparing Meals.
- Dining Mode: Dim Lighting for Having Meals with the Family.
- Entertaining Mode: Inviting Lighting for Hosting Guests and Social Gatherings.
If you have many recessed lights or fixtures, smart switches might be a more convenient solution rather than installing dim bulbs. Furthermore, motion sensing can be an easy way to have hands-free lighting
🛋️Outdoor
Outdoor smart lights provide greater security, safety, and curb appeal. Schedule porch and walkway lights to be turned on automatically at dusk and turned off at dawn or at a specific time. Outdoor lights can also be programmed using motion sensors that trigger light whenever there is any movement outside the house.
Use devices that have an IP rating of 65 or above to be protected against water damage. Smart outdoor plugs allow you to automate your holiday lights.
Vacation mode is another great feature that allows you to turn your lights on and off randomly when you are out of town.
Common Setup Problems & Fixes
Connection failure is the most frequent problem for smart lighting products. If your device refuses to connect, follow the manufacturer’s reset instructions and attempt a new connection.
Regarding Wi-Fi problems, try restarting your router, make sure the 2.4GHz band is active, and if necessary, place the device near the router while setting it up.
When the application does not recognize your device, restart the application and your smartphone and check whether the relevant permissions are active.
Voice assistant issues can frequently be sorted out through relinking your smart lighting profile and performing another device discovery operation.
If you have trouble with repeated disconnections, network interference may be the cause. Consider upgrading your router or even adopting a mesh Wi-Fi solution for homes with multiple smart devices.
Smart Lighting Setup Cost (USA)
Basic packages ($20-$50) include 2 or 3 smart bulbs or a simple smart switch, allowing you to have app control, dimming capabilities, and support for voice assistants in a single room.
Intermediate packages ($50-$150) provide multi-room capability, offering such options as color-changing light bulbs, enhanced dimming controls, motion sensors, and more sophisticated scheduling.
High-end solutions ($150+) include whole-home coverage, outdoor lights, smart hubs, advanced automation, and better performance.
Typically, smart bulbs are priced at around $8-$30 apiece, whereas smart switches vary from $15 to $60. Smart LED lights are far more efficient compared to regular ones; hence, most people pay off the initial cost with energy savings.
Smart Lighting Safety Tips
Be sure to switch off the power supply by turning off the circuit breaker before installing the smart switches, and test for electricity using a voltage detector. Taking a picture of your old wiring setup will help simplify your work during the installation process.
Purchase reliable smart lighting products with certified safety standards; avoid purchasing cheap but unsafe equipment.
Do not overload your circuits when installing several smart devices in your house, especially if you live in an old building.
As far as cybersecurity issues are concerned, set up your Wi-Fi password and activate the WPA3 security protocol.
Benefits After Setup
First of all, smart lighting provides an opportunity for remote controlling, voice controlling, and scheduling of lighting that helps manage light without physical involvement.
In addition, smart lighting can decrease energy consumption because it is capable of switching off unnecessary lights and employs efficient LEDs.
Security-wise, motion lighting, remote controlling, and vacation mode are just some of the many ways through which smart lighting makes your home look inhabited.
Moreover, smart lighting lays the foundation for the creation of smart homes because it allows integrating such devices as security systems, thermostats, and voice assistants into one system.
❓FAQs
Can I install smart lights myself?
Absolutely, installation of smart bulbs does not require any electrical expertise; all one needs to do is screw them onto the existing sockets. While installation of smart switches involves some electrical wiring work, anyone can install them with proper safety measures. One is required to shut down the electricity from the main circuit and check whether the wires have current using a tester.
Do I need a hub?
Most smart lighting systems today come without hubs because Wi-Fi-compatible lamps and switches are able to connect to your router directly through an app on your phone. However, a hub is very useful for more complex automation and increased reliability.
Why won’t my smart bulb connect?
The connectivity problem can occur due to an issue in Wi-Fi connection or a requirement for resetting. Make sure that the phone is connected to the same 2.4GHz Wi-Fi network as the lightbulb. Perform a factory reset of the lightbulb following the manufacturer’s instructions (usually by switching it on and off five times rapidly).
Can I control lights when away from home?
Yes, smart lights that are connected to Wi-Fi allow you to control them remotely using manufacturer applications provided that your home internet is working. You can do things such as turning the lights on or off, adjusting the dimming levels, and changing your automation timers.
Are smart lights safe?
Quality smart light bulbs manufactured by reliable brands are equally safe as conventional electrical products. Ensure you purchase a UL-listed product and follow the installation guidelines. Electrical installation is mandatory when installing smart switches, while using smart bulbs poses no more safety concerns than conventional LED light bulbs. It is crucial to safeguard your Wi-Fi network from any cyber threats.
🔗Related Articles
- 9 Best Smart Bulbs in 2026 (USA Guide) – Top Smart Lights
- 9 Best Smart LED Light Strips (2026 Review)
- Best Budget Smart Lights Under $50 (2026) – Affordable Smart Lighting Guide
- Best Philips Hue vs LIFX vs TP-Link Kasa Smart Bulb Comparison for 2026
- Do Smart Lights Work Without Internet? (Explained Clearly)
- What Is Matter in Smart Homes? Complete Beginner’s Guide (2026)
🚀Conclusion
Installing smart lighting has never been easier regardless of whether you are going for smart lights that offer an easy transition from your existing setup or smart switches for whole-home control. Some of the advantages of having smart lighting in your house include ease of use, energy savings, automation, and added security.
Begin by installing several smart lights where needed, then add more as required. After you are familiar with how they work, go further and explore other features such as voice commands, setting times for specific activities, using scenes, and automation.
The current smart lighting options available have made it easier and cheaper for anyone to integrate smart technology in their home.
Ready to upgrade your home? Check out our recommended smart lighting products to find the best devices for your specific needs and budget.